Creating the Pond
Lesson 4, page 3 of 14
The first element we will create is one that represents the pond volume itself. To represent the pond, we'll use a Reservoir A Stock element that integrates and conserves flows of materials. element.
Recall from a previous Lesson that a Reservoir accumulates materials, and is useful for representing things like quantities of materials or items (e.g., water, soil, widgets). In its simplest form, a Reservoir requires as inputs an Initial Value, a Rate of Addition and a Rate of Withdrawal, and outputs a Current Value using the following equation:

Note: Reservoir elements The basic building blocks with which a GoldSim model is constructed. Each element represents a feature, pararamer, process or event in the model. provide a generic way to keep track of a quantity (such as the volume of water in a pond). GoldSim actually provides a specialized version of the Reservoir element (called a Pool) that is more flexible and powerful. Hence, most experienced users would utilize the Pool element to represent a pond such as this. However, in this Tutorial, due to the simplified nature of the system A subunit of the world separated by a boundary from the rest of the world. The description of the system is comprised of the relations within the system as well as those characterizing the action of the outside world on the system., and for the purpose of illustrating basic GoldSim concepts, we will use the more generic and simple Reservoir element rather than a Pool element to represent the pond.
Add a Reservoir Element and Define its Initial Value:
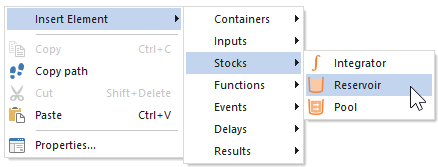
- In the Graphics pane The primary portion of the GoldSim interface, where the graphical depiction of the model is shown., right-click, choose Insert
Element, Stocks, and then select Reservoir:
Once you've inserted the element, its Properties dialog will immediately open: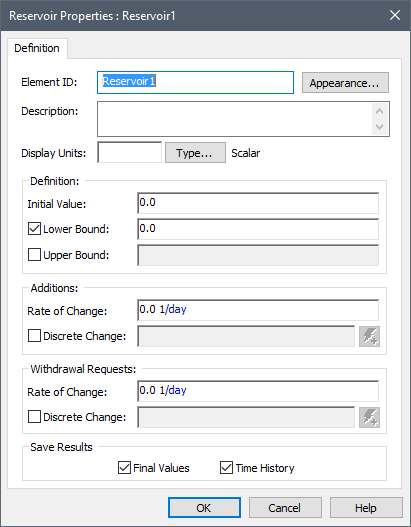
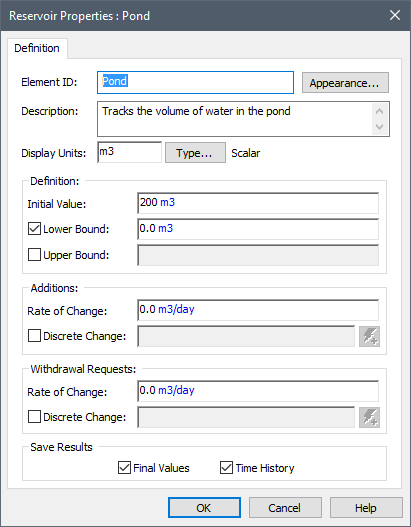
We will now define some of the properties of the Reservoir element: - In the Element ID field, type "Pond".
- In the Description field, type "Tracks the volume of water in the pond".
- In the Display Units field, type "m3".
- In the Initial Value field, type "200 m3". That is, we will assume that at the beginning of the simulation (i.e., now), that is how much the pond contains.
- We'll leave the other
fields blank for now (we will come back to these later). The dialog should now
look like this:
- Press OK to close the dialog.
- Press the Save button in
the toolbar (or press Ctrl+S):
