Creating the Model
Lesson 4, page 2 of 14
Our first step is to create a new model.
Note: You can keep the Tutorial Example we have already looked at open in one instance of GoldSim while creating the new model in another instance of GoldSim. This will allow you to compare the elements The basic building blocks with which a GoldSim model is constructed. Each element represents a feature, pararamer, process or event in the model. in your model to the elements in the completed model if your model isn't behaving as it should. To do so, simply click the GoldSim shortcut in the start menu, task bar or desktop to open a second instance of the program. You can close the splash screen that appears by clicking anywhere in the window.
Create a New Model and View the Simulation Settings:
- Press the New Model button
on the toolbar:

- Press the Simulation Settings button:

- The Simulation Settings
dialog will be displayed (with the first tab, labeled Time,
selected):
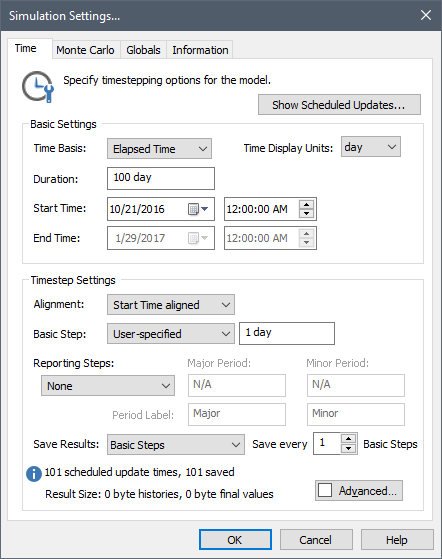
- For this simple model, all of the fields can be left at their default values (in particular, a Duration of 100 day and a Basic Step of 1 day).
- Press OK to close the dialog.
You now have a new GoldSim model with a blank graphics pane The primary portion of the GoldSim interface, where the graphical depiction of the model is shown..
It's good practice to regularly save a model as you work on it, so let's save your new model now.
Save a Model:
- Press the Save button in
the toolbar (or press Ctrl+S):

- You will be prompted for a filename and location. Note that the extension for a GoldSim model file is ".gsm".
Note:If there are unsaved changes in a model, the filename will have a * after it in the GoldSim window's title bar (e.g., ModelName*).